

 Français
FAQ, Getting started
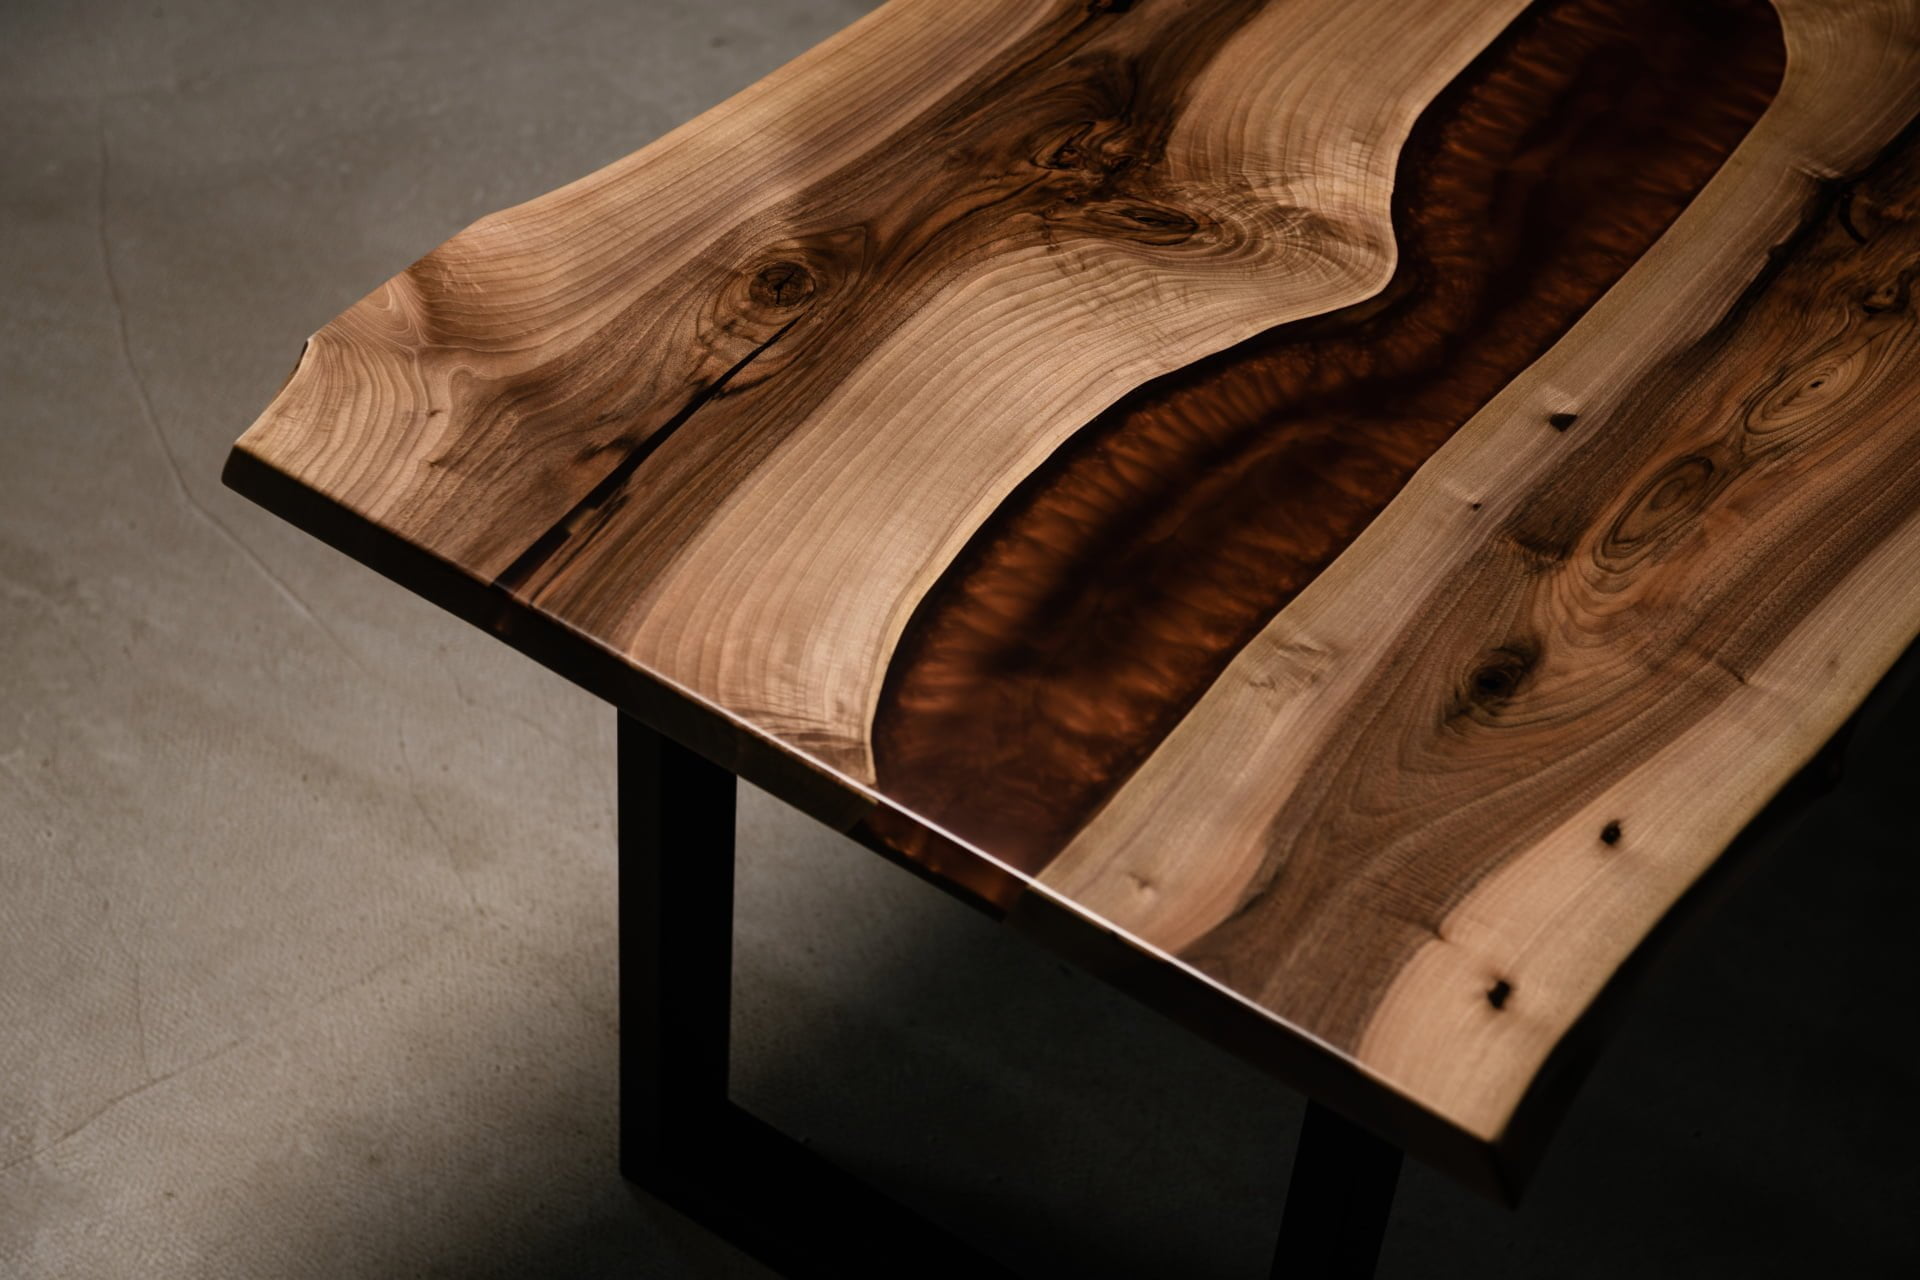
Building a Live Edge Epoxy Resin Table: A Step-by-Step Guide
Nov
Building a Live Edge Epoxy Resin Table: A Step-by-Step Guide
Building a live edge epoxy resin table is a beautiful and unique way to add a piece of natural art to your home. The process is a bit involved and requires some specialized tools and materials, but the end result is worth it. Here’s a step-by-step guide to building your own live edge epoxy resin table.
Step 1: Gather Materials and Tools You will need a live edge slab of wood, epoxy resin, hardener, pigments, a heat gun, a mixing stick, a mixing cup, a spreader, a plastic squeegee, a roller, a paintbrush, a saw, a sander, and a drill.
Step 2: Prepare the Slab Start by selecting a live edge slab of wood. Make sure it is dry and free of any cracks or knots that could interfere with the epoxy resin. Use a saw to cut the slab to the desired size and shape. Use a sander to smooth the edges and surface of the slab.
Step 3: Mix the Epoxy Resin Mix the epoxy resin and hardener according to the manufacturer’s instructions. You can add pigments to the mixture to add color or create a marbled effect. Mix the epoxy resin and hardener well to ensure a smooth and even finish.
Step 4: Apply the Epoxy Resin Use the spreader to apply the epoxy resin mixture to the surface of the slab. Use the plastic squeegee to remove any excess resin and level the surface.
Step 5: Finish the Surface Allow the epoxy resin to cure for at least 7 days. Once the epoxy resin is cured, use a sander to smooth the surface. Use a drill to make any necessary holes or attachments.
Step 6: Enjoy Your live edge epoxy resin table is now complete and ready to be used. Enjoy the unique beauty of your natural wood and epoxy resin creation.
As a final note, using Epoxy Resin is a fairly complex process and require some knowledge of the material and experience. It’s recommended to have a professional help you in case you are not comfortable with the process, or if you are unsure of how to use the tools and materials properly.
STEP 1 – Select your wood
When selecting the wood for your live edge epoxy resin table, there are a few things to consider.
- Type of wood: Different types of wood have different characteristics, so it’s important to choose a wood that will suit your needs. Hardwoods such as oak, walnut, and cherry are durable and will withstand heavy use, while softer woods like pine and cedar may be more suitable for decorative pieces.
- Grain pattern: The grain pattern of the wood can affect the overall look of your table. A wood with a straight, tight grain will give a clean, modern look, while a wood with a wild, wavy grain will give a more rustic, natural look.
- Size and shape: Consider the size and shape of the space where you plan to put the table. A large, rectangular table may be suitable for a dining room, while a smaller, round table may be better for a living room.
- Natural Feature: Live edge table is all about showing off the natural feature of the wood, therefore you need to look for a slab that has a unique natural feature, such as knots, burls, or spalting, to make your table stand out
- Seasoning: The wood should be seasoned, which means it has been dried to a moisture content of around 6 to 8 percent. This will prevent the slab from warping or cracking after the epoxy resin is applied.
It’s important to select a high-quality piece of wood that will look great and last for years to come. You may want to visit a lumber yard or wood supplier to find the perfect piece of wood for your table.
STEP 2 – Ensure the lowest possible humidity level
To ensure the lowest possible wood humidity level when building a live edge epoxy resin table, it is important to properly dry and store the wood before using it. Here are a few steps you can take:
- Air dry the wood: If possible, air dry the wood for at least 6 to 12 months before using it. This allows the moisture in the wood to evaporate and the wood to reach a stable moisture content.
- Kiln dry the wood: If air drying is not an option, you can kiln dry the wood. This process uses heat and controlled humidity to dry the wood quickly. Kiln-dried wood typically has a moisture content of 6 to 8 percent.
- Store the wood properly: Once the wood is dry, it’s important to store it in a cool, dry place. Avoid storing it in damp or humid areas, as this can cause the wood to absorb moisture and increase its humidity level.
- Measure the humidity level: Before starting your project, use a moisture meter to check the humidity level of the wood. You want to make sure it is at or below 8% to avoid any issues with the epoxy resin.
- Use a dehumidifier: If you’re storing the wood in a damp area and the humidity level is too high, you can use a dehumidifier to remove excess moisture from the air.
It’s important to note that even if you dry the wood properly, humidity can still cause issues. If you suspect that the humidity level is too high, you may want to wait before starting the project and monitor the humidity level with a hygrometer.
STEP 3 – Seal your wood
Sealing your live edge wood before using it in a live edge epoxy resin table is an important step to prevent any issues with the epoxy resin. Here are a few steps you can take to seal your live edge wood:
- Clean the wood: Use a clean, dry cloth to remove any dust or debris from the surface of the wood.
- Sand the wood: Use a fine-grit sandpaper to smooth out any rough edges or surface imperfections. This will help the sealer adhere better to the wood.
- Apply a sealer: Use a brush or roller to apply a sealer to the wood. There are several types of sealers to choose from, such as polyurethane, shellac, or wax. Be sure to follow the manufacturer’s instructions for application and drying time.
- Allow the sealer to dry: Allow the sealer to dry completely before moving on to the next step. This typically takes around 24 hours.
- Sand the wood again: Once the sealer is dry, use a fine-grit sandpaper to smooth out any rough or uneven areas. This will give you a smooth surface to work with.
- Apply a second coat of sealer: Apply a second coat of sealer, if desired, for added protection.
Sealing the live edge wood will prevent any resin from penetrating the wood and creating issues like bubbles or discolorations. Additionally, the sealer will add an extra layer of protection to the wood against humidity and other environmental factors. Seal the wood (live Edge), knots and cracks with the CHILL SEALER (2:1) making sure to apply a minimum of 1-2 coats. If done correctly, this procedure will prevent bubbles from escaping during the exothermic reaction.
Using the CHILL SEALER (2:1) low viscosity epoxy seal coat (2:1), mix two parts resin to one part hardener in a graduated container and mix a maximum amount of 300-600ml. Mix the resin for 3-4 minutes. Using a brush or roller coat all sides of your wood in contact with the resin. This step will create a barrier that helps eliminate bubbles and eliminate the presence of moisture. Let the layer of CHILL SEALER harden for 6-8 hours at 72F/22C. Usually it will be possible to pour the next day without problems.
STEP 4 – Build your mold
uilding a mold is an important step when creating a live edge epoxy resin table, as it will help to contain the epoxy resin and give the table its final shape and size. Here’s a step-by-step guide to building your mold:
Step 1: Measure and cut the wood Measure and cut the wood to the desired size and shape of your table. The mold will be the exact size and shape of your finished table.
Step 2: Assemble the mold Assemble the mold using wood glue and clamps. Make sure that the joints are tight and secure.
Step 3: Seal the inside of the mold Seal the inside of the mold using a sealer or a release agent. This will prevent the epoxy resin from sticking to the mold and make it easier to remove the table once it’s cured.
Step 4: Test fit Place the live edge slab inside the mold to ensure that it fits properly and that the dam is secure.
It’s important to note that building a mold can be a complex process, and if you’re not comfortable with it, you should consider hiring a professional. Additionally, using a release agent is crucial for the easy release of the final product and make sure you are using a release agent that is compatible with epoxy resin.
In order to make a mold for a resin table, we recommend using MDF or melamine. Once the material of your mold has been cut, it is possible to use two types of techniques to ensure that the epoxy does not stick to your mold. First, use a silicone-based release agent – CHILL RELEASE 110. Apply 2-3 coats with an interval of 15 minutes and blot excess with a clean cloth. It is also possible to use TUCK-TAPE or TYVEK tape on the interior surfaces of the mold. Make sure all sides of the mold are sealed or the epoxy will stick to the mold. In order to add additional protection, it is important to apply silicone on all the interior angles as well as the exterior insertions of the mold in order to prevent the epoxy from leaking outside your mold.
Prepare your mold by applying CHILL RELEASE 110 ( Liquid silicone) in 2-3 coats depending on the porosity of the latter. Let stand for about 15 minutes at 22C/72F between layers. Make sure you apply it over the entire surface and sides of the mold. Take meticulous care of the 90 degree angles of the mold. Always use a clean cotton cloth or a clean brush that has never been used and is completely free of contamination.
Pour a thin layer of resin in the mold before placing the piece of wood in it, which will avoid the possible phenomenon of “chimney” that is an exhaust of air coming from the interface of the mold and the piece of wood. Leave about 30-60 minutes so that the resin can travel under the piece of wood and evacuate all the air housed under it. Note that it is sometimes difficult to completely remove the air under the piece of wood.
STEP 5- Secure the pieces of wood
Securing the pieces of wood in place before pouring the epoxy resin is important to ensure that the table will have a smooth and even finish. Here are a few steps you can take to secure the pieces of wood:
- Position the wood: Position the live edge slab inside the mold, making sure that it is level and centered. Use shims or wooden wedges to adjust the position of the wood if necessary.
- Clamp the wood: Use clamps to secure the wood in place. Place the clamps around the edges of the wood and tighten them to hold the wood securely in place.
- Check the level and alignment: Before pouring the epoxy resin, double-check that the wood is level and aligned correctly. Make any necessary adjustments before moving on to the next step.
It’s important to make sure that the wood is held securely in place, so that the epoxy resin can be poured evenly and without any air bubbles. Additionally, if you’re using a release agent, make sure that the wood is in good contact with the mold to avoid any issues with the final product.
STEP 6 – Select the right epoxy system
- For a project from 1/2 to 1.5″ we recommend our CHILL ICE 1 (2:1), ideal for smaller/medium projects like coffee tables, river tables 8-12 inches wide with a thickness of 1.5″ maximum.
- For a 1.5 to 2″ project we recommend our CHILL ICE 2 (2:1). Formulated for edge tables up to 2″ and with greater lengths and widths. Considerable amounts can be cast , all in one pour without the need to cool the system with fans.
- We also have a system called CHILL DEEP FOR (2:1). This unusual system was formulated for the 1% of projects. With the CHILL DEEP POUR, it is possible to pour 60-100L in a single pour with a thickness between 2-2.5″ without cooling.
STEP 7 – Mixing process
Ensure a completely homogeneous mixture (see recommendations given in the mixing section here (LINK)
Pour the selected CHILL EPOXY product to the desired thickness. Please note that POLYMÈRES TECHNOLOGIES customer service or its various sales outlets can assist you in choosing the right CHILL EPOXY product for your application.
Build a Live Edge Epoxy Resin Table : IMPORTANT: IT IS POSSIBLE TO CAST IN SUCCESSIVE LAYERS IN ORDER TO AVOID TOO HIGH EXOTHERMIC CURVE IF YOU THINK YOU HAVE SELECTED THE BAD CHILL EPOXY PRODUCTS. IF YOU PREFER TO DO SO, PLEASE NOTE THAT THE POLYMERIZATION PROCESS WILL BE AFFECTED.
STEP 8 – Maintain a stable environment
Maintain a stable environment at 22 degrees C for the duration of the polymerization (may vary depending on the product, mass and thickness). Waiting a minimum of 7 days 22C/72F is required. Naturally, the areas with low volume of resin may not have reached its complete polymerization after this period. Do not worry, if you have proceeded to the precise quantity of parts A and B and mix them completely homogeneously, the thin layers will polymerize slowly.
STEP 9 – Demolding the project
Unmold the piece and secure it on a flat and stable surface for about 7 days at 22 degrees C. Using a shore D durometer (ASTM D-2240), you will be able to know where the hardness curve of the CHILL EPOXY product, thus preventing you from demolding too quickly, the hardness of 81-83 shore D being the final hardness of CHILL EPOXY products. Never unmold your part too quickly, which could cause the part to sag. If this situation arises, it is always possible to rectify this situation (see recommendations above).
Build a Live Edge Epoxy Resin Table : Patience is essential when making a river table. Remember, you can’t pull a flower to make it grow faster.
Building a live edge epoxy resin table is a unique and beautiful way to add a piece of natural art to your home. The process is a bit involved, and requires some specialized tools and materials, but the end result is worth it.
The first step is to gather the materials and tools required, and the second step is to prepare the live edge slab of wood by cutting and sanding it to the desired size and shape.
Third step is to mix the epoxy resin and hardener according to the manufacturer’s instructions.
Fourth step is to finish the surface by allowing the epoxy resin to cure for at least 7 days, and then sanding it to smooth the surface, and drilling any necessary holes or attachments.
Before pouring the epoxy resin, it’s important to build a mold that will help to contain the epoxy resin and give the table its final shape and size. Additionally, it’s important to seal the live edge wood and secure it in place before pouring the epoxy resin to ensure that the table will have a smooth and even finish.
Keep in mind that using Epoxy Resin is a complex process and may require some knowledge and experience. It’s recommended to have a professional help you in case you are not comfortable with the process or if you are unsure of how to use the tools and materials properly.